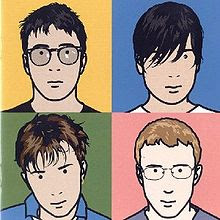
 Julian Opie is a visual artist, and one of the New British Sculpture movement. Julian Opie's style was first recognised when creating the compilation album cover for Blur. In his portraits he portrays his images by using black outlines with areas of colour and very little detail. The face is normally a circle area of colour, sometimes without a neck and often black circles for the eyes and pupils. Opie's aim is to show personality through these images with very little amount of detail.
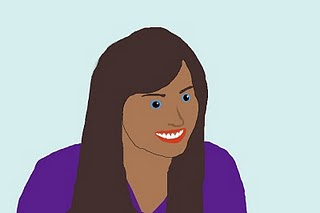
 To create my Opie I uploaded a photo of my self onto the  computer. I then put it into the Photoshop programme. I used the lasso tool to split my photo into seperate facial parts starting with my hair. I then selected the dropper tool to try and get a perfect match of my original hair colour. I used the fill bucket to creat a flat block colour for my hair. I then went onto my face shape and the features on my face such as eyes etc. Once I had created my basic image I enhanced the natural lines and shadows on my face to emphasis features such as my chin. To do this I used the lasso tool and simply made that section slightly darker than the flat colour used. I felt that this task was a great introduction to Photo shop and has helped me deveolp my skills at using the programme greatly.
 computer. I then put it into the Photoshop programme. I used the lasso tool to split my photo into seperate facial parts starting with my hair. I then selected the dropper tool to try and get a perfect match of my original hair colour. I used the fill bucket to creat a flat block colour for my hair. I then went onto my face shape and the features on my face such as eyes etc. Once I had created my basic image I enhanced the natural lines and shadows on my face to emphasis features such as my chin. To do this I used the lasso tool and simply made that section slightly darker than the flat colour used. I felt that this task was a great introduction to Photo shop and has helped me deveolp my skills at using the programme greatly.

